


Turning Images Into Thread Art: Custom Embroidery Digitizing Explained
Custom embroidery digitizing is equal parts technical skill and creative vision. Unlike printing where colors directly transfer to fabric, embroidery requires translating an image into a language of stitches that a machine can follow.

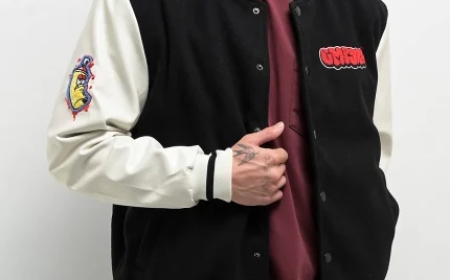
That favorite photo of your dog. Your company's sleek logo. Your child's crayon drawing. These can all become stunning embroidered creations through the magic of digitizing - the process that transforms ordinary images into stitchable thread art. But how does that colorful picture actually become embroidery? Let's pull back the curtain on this fascinating craft.
The Art and Science of Thread Translation
Custom embroidery digitizing is equal parts technical skill and creative vision. Unlike printing where colors directly transfer to fabric, embroidery requires translating an image into a language of stitches that a machine can follow. Think of it like giving a paint-by-numbers guide to a robotic artist who only works in thread.
A skilled digitizer doesn't just convert an image - they interpret it for the unique medium of embroidery. They make decisions about:
- Which areas become satin stitches (smooth and shiny)
- Where to use fill stitches (for coverage)
- How to handle tricky elements like gradients or fine lines
- The optimal stitch direction for each section
- Color transitions and thread changes
Why You Can't Just Hit "Convert"
Many beginners wonder why they can't simply run an image through some software and get perfect embroidery. The truth? Automated conversions often produce disappointing results because:
- Computers don't understand fabric behavior
- Algorithms miss subtle details a human would catch
- Stitch direction dramatically affects the final look
- Thread has physical limitations pixels don't
That's why professional digitizers still command good money - their expertise bridges the gap between digital images and physical thread.
The Digitizing Process Step-by-Step
1. Image Preparation
Before any stitches are planned, the original image gets cleaned up:
- Backgrounds removed
- Colors simplified
- Contrast enhanced
- Problem areas edited
This stage determines how well the rest of the process goes.
2. Stitch Mapping
The digitizer "draws" the design using specialized software, assigning:
- Stitch types (fill, satin, running)
- Stitch directions (critical for texture)
- Density (stitches per inch)
- Underlay (foundation stitches)
3. Path Planning
Like planning a road trip, the digitizer maps the most efficient stitching route to:
- Minimize jumps between sections
- Reduce thread changes
- Prevent fabric distortion
- Optimize machine movement
4. Testing and Refining
No professional digitizer sends a file untested. They'll:
- Stitch out samples
- Identify problem areas
- Make adjustments
- Repeat until perfect
What Makes a Good Embroidery Design?
Certain images translate to thread better than others. Ideal candidates have:
? Clear, bold lines
? Limited color complexity
? Defined shapes rather than photorealistic detail
? Enough size to maintain clarity when stitched
Challenging designs include:
? Photos with subtle shading
? Tiny text (under inch tall)
? Watercolor-style gradients
? Extremely complex patterns
The Tools of the Trade
Professional digitizers use specialized software like:
- Wilcom- Industry standard with advanced features
- Pulse- Favored by many premium digitizers
- Hatch- Popular for its balance of power and usability
These programs cost hundreds to thousands of dollars because they offer precise control over every stitch.
DIY Options for Hobbyists
Not ready to invest in pro tools? Try these more accessible options:
- Ink/Stitch(Free with Inkscape)
- Embrilliance(Budget-friendly)
- SewArt(Good auto-digitizing)
While limited compared to professional software, they work for simple projects.
Understanding File Formats
Different machines read different file types. Common ones include:
- DST- Standard for commercial machines
- PES- Brother home machines
- VP3- Husqvarna/Viking
- JEF- Janome
A good digitizing service will provide your design in the right format for your machine.
Why Professional Digitizing Costs More
You might find cheap digitizing services online, but you often get what you pay for. Quality digitizing costs more because:
- It takes significant time (1-3 hours per design)
- Requires expensive software
- Demands specialized knowledge
- Saves you money in wasted materials from poor files
Custom Digitizing for Special Effects
Beyond basic conversion, experts can create:
- 3D Puff- Raised, dimensional areas
- Trapunto- Quilted texture effects
- Metallic Threads- Special handling for shiny finishes
- Appliqu- Combining fabric pieces with stitching
The Magic of Seeing Your Design Stitch Out
There's something thrilling about watching your digital creation become physical thread art. As the needle dances across the fabric, what was once just an image on screen transforms into a tactile, textured piece.
This transformation never gets old, whether you're:
- Personalizing gifts
- Creating branded merchandise
- Making custom fashion
- Preserving memories in thread
Getting Started With Your First Project
Ready to turn your image into embroidery? Here's how to begin:
- Choose a simple, high-contrast image
- Decide on size and placement (hat, shirt, etc.)
- Select a digitizing method (DIY or professional)
- Get your file in the right format
- Test stitch before final use
The Future of Embroidery Digitizing
Technology keeps advancing the craft:
- AI-assisted digitizing tools
- Improved auto-digitizing algorithms
- More realistic stitch simulations
- Better integration with design software
Yet the human touch remains essential - machines still need artists to guide them.
Your Turn to Create
Now that you understand what goes into turning images into embroidered art, you're ready to start your own projects. Remember that like any craft, digitizing takes practice. Your early attempts might not be perfect, but each one teaches you more about how stitches can bring images to life.
Whether you choose to learn digitizing yourself or work with professionals, a world of creative possibilities awaits. That image in your mind or on your screen? It could be your next wearable masterpiece in thread.